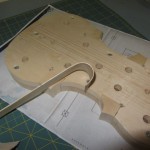
Today was all about learning how to bend wood. I need to pretty much know what I’m doing before I start trying to bend the real violin rib wood because there’s basically jut enough to do the violin without much room for mistakes or scrap.
So, I started the day by ripping off a few 20 inch thin strips of spruce from the long 2×4 I had to buy the other day. These strips will also serve as stock for the rib linings that I’ll be cutting next week. I had cut several different thicknesses of the strips and started out trying to bend the thickest of the bunch… why? I have no idea, but it turned out to be a mistake. Later, after many failed attempts, I cut a piece much closer to the thickness of the ribs. I had some success when combining this thinner piece with a modified approach to the bending process.
The real breakthrough came when I got some advice from amateur luthiers Kathy and Ray (THANK YOU!!!) who suggested:
- Use a cut down piece of aluminum flashing as a bending strap.
- Don’t wet the wood too much.
I also read in “The Art of Violin Making” that you should use a damp rag just to get some steam into the wood but that the actual bending should be done with wood against iron.
In the end, after about 6 hours and many intermediate failures, Success! I managed to make a very tight bend without a single split or tare.
Here’s the video showing the whole process I went through today. The right way is shown near the end.
FYI, I might consider buying one of the stainless steel straps sold by luthier tool shops to avoid the possible blemishes caused by the aluminum rubbing off on the wood.