I’ve been backpacking from time to time over the last 40 years. Over that time I’ve used a wide variety of backpack stoves, cooking equipment and techniques. In this article I’ll introduce you to most of the backpack stoves I’ve used and explain why I’ve made the decisions I have made, and what I use now. What’s kind of interesting is that I’ve come just about full circle from where I started all those years ago.
If you’re looking for a backpacking stove make sure and check the Resources at the end of the article!
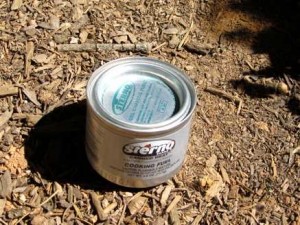
When I first started backpacking, way back in the late 60’s, I was young, my budget was small, and my needs simple. As it turns out, this is a great combination for setting up your backpacking equipment. My first backpacking “stove” was pretty much just one or two small cans of sterno. Each can weighs about 4 oz and is good for boiling several pints of water if you’re quick about putting them out and getting the lid back on. One or two cans was all we needed for several days of backpacking. Of course, this was true in part because, like I said, our needs were simple. Our cooked food menu consisted almost entirely of simple pasta or noodle dishes, and maybe the occasional oatmeal breakfast.
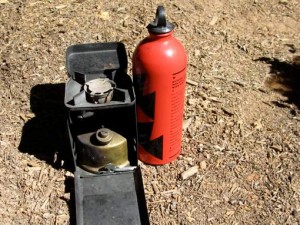
After several extended backpacks, and an increase in my discretionary spending budget, I found myself in one of the fancy outdoor equipment stores in Berkley, California and could not resist buying this fancy, white gas, adjustable flame, Primus backpacking stoves.
This stove, by comparison to the simple Sterno method, was absolutely awesome. Now, we could fry trout we caught, boil water in just about no time, and lots of it, and you could even turn the flame down to almost nothing to simmer a dish if you wanted to. Now, our menus could get a lot fancier!
In my youth, what I did not pay attention to, or even notice for that matter, was that between the stove, fuel bottle, and fuel, I had increased the weight of my pack by 2 1/2 pounds. On top of that, with the added cooking flexibility, I had increased my cook set from one simple aluminum pot, to include multiple pots and a frying pan for a total increase in weight of probably more that 5 pounds. But, like I said, I was young, strong, and probably just a bit stupid.
The Primus was, and still is, a great little stove. It served me well for at least 20 years of periodic backpacks. Then came my involvement as a Boy Scout leader and with it, renewed interest in looking at equipment alternatives.
One of the problems with the Primus stove is that it needs to be primed. Priming, in this case, entails pouring a small amount of white gas into a little cup shaped indentation at the top of the stove’s gas tank, and lighting it on fire. This heats up the tank enough to create enough pressure to start the stove operating.
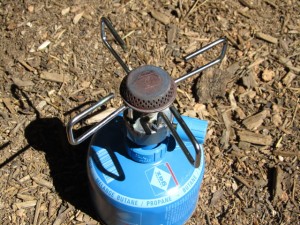
This priming operation works well, and as long as its done carefully, is not a problem. However, for a minute or so, you do have an open flame and white gas that can be spilled if you (or a scout running by) happens to spill the stove at the wrong moment. So I decided to have a look at bottled gas canister stoves available at the time. The Gaz stove you see here is what I settled on. (NOTE: This Stove / Fuel is no longer available.)
On the positive side the Gaz stove is extremely convenient. You just connect the burner element to the gas canister light it up, and you’re ready to go. It also has the adjustable flame of the Primus and plenty of heat for most any cooking method.
One down side is that seldom do you end up at the end of a trip with all the canisters you brought, completely empty. So, you often end up starting the trip with multiple canisters, some new, some partly used. About half the weight of the gas canister is the canister itself so you’re carrying around about half a pound of dead weight if you’ve got an empty canister. Another minor problem is that if you start with a partial canister, you may end up running out of fuel before you’re done cooking. Then you have to wait until the burner cools down before you can change canisters. Also, while these units are lighter than the combination of Primus and its fuel bottle, the weight savings for fuel and bottle is only about a pound and you still have the temptation to bring multiple pots and pans.
What finally pushed me into making my next stove decision was how the Gaz stove reacts to cold. We had gone on a Snowshoe backpack with the scouts. I had taken the Gaz stove and when I went to make dinner the first evening, at about 30 deg F, I could not get the stove to work. I finally figured out that I needed to warm the fuel bottle to get it lit. Even after I got it lit it was hard to keep going and did not have nearly the heat output needed to melt snow for drinking water. So, it was decision time!
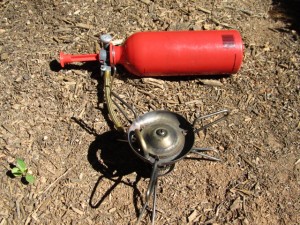
After doing quite a bit of research and hanging around the outdoor gear store for way too long I decided on the MSR Whisperlite International that you see here. This is really a cool stove! You can burn white gas, automobile gasoline, Kerosene, and even Jet Fuel! It requires some simple field maintenance to burn some of these fuels, but big deal! Truth be told though, I never burned anything other than white gas in my unit.
Rather than relying on a heated tank to build up pressure, this stove has a pump that fits your fuel bottle. You still need to prime this stove, but the process is simpler and does not involve as much exposed gas as the Primus.
The Whisperlite has plenty of heat output for melting snow, boiling lots of water, or frying, but can also be adjusted way down for simmering, etc. It’s also more compact than the Primus and rather than having one fuel tank on the stove, and another for your spare fuel, there’s just the spare fuel tank that doubles as the stove tank when in use.
On the negative side, this stove, with a full fuel bottle, weighs in at about 2 pounds so it’s only about a half pound lighter than the Primus. Here once again, because of the great heat output, and flame control, I always found myself packing along multiple pots and pans and planning complicated meals, further increasing my pack weight. That said, the Whisperlite is my number one choice for use in the snow or very cold conditions. It’s ease of use and superior heat output make it great for melting snow or heating large quantities of water.
Once I bought the Whisperlite stove, I used it almost exclusively for years afterward.
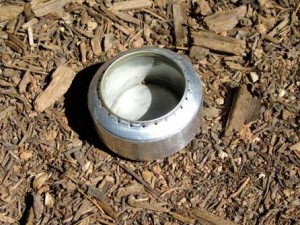
A few years ago, after I’d pretty much wrapped up my participation in Scout backpacks, and was going out more on my own or with small groups, I started getting interested in lightening my load. In the process of doing some research on ultralight backpacking, I found this Make Your Own Gear website that provided a lot of plans and instructions for making your own alcohol stoves. One of the first alcohol stoves I built was this one that you see to the left. It burns denatured alcohol that you can buy in the paint department at just about any hardware store. The stove itself is made out of two aluminum soda cans, cut up and pieces put back together.
This stove is extremely light!!! That’s exactly what I was after. Another positive about this stove, at least if you’re trying to lighten up, is that it’s not much good for anything other than boiling a couple cups of water. So, as a result, there’s really no point to bringing more than one pot. In my case, I went one step further and spent the extra money for a nice titanium pot. The only problem with this stove is that it is not very efficient compared to some others.
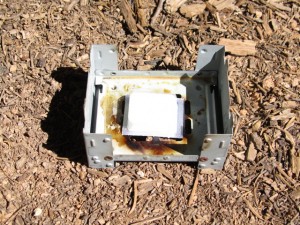
While experimenting with different lightweight options, I also tried out the Esbit stove. This unit burns small fuel tablets. The “stove” shown here is made of steel and is one of the heavier options. If you want to spend a bit more money, there are some very small, lightweight, titanium Esbit stoves available. I tried these a couple times and, though I don’t recall exactly why, I didn’t really like it as much as the alcohol stove. Others however swear by them.
One really positive thing about this system is that there is no way to spill your fuel! On the down side they are a bit smelly and are difficult to put out once lit.
I would definitely recommend Esbit as a “survival kit” stove option!
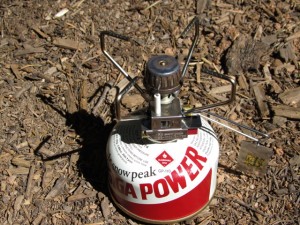
Another lightweight alternative that I’ve tried and liked is the Snow Peak Giga Power Stove. This is like a miniature light weight version of the Gaz stove. The version I have has a Piezoelectric lighter which makes it extremely easy to light! With its adjustable flame, light weight, small size, and electric start convenience, this is my current choice for backpacks where I’m not trying to go to far or to fast.
The combination of fuel and stove weighs about a half pound. You can get a titanium version that is even lighter.
The fuel canisters are difficult / impossible to find on-line but are available at larger sporting good stores that cater to backpackers.
Another similar, and very popular option is the MSR Pocket Rocket stove that you can see in the Resources below.
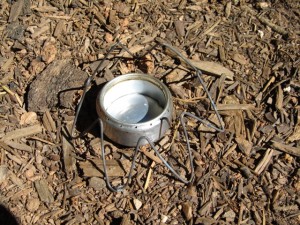
My other current favorite, and the one I use if I want to go fast and light, is another home made alcohol stove that goes by the name “Turbo V8”. It got the name because it started life as two small aluminum V8 cans. There are instructions for its construction here on the Make Your Own Gear website.
I made the crown-like pot stand you see pictured out of a piece of Titanium welding wire (rare unless you live near a naval shipyard and air station). I tried using an aluminum weld wire but this little alcohol stove put out enough heat to melt it!!!
This is a very efficient stove! With just one ounce of fuel I can boil a pint of water in less than 10 minutes. I use a home made pot cozy to keep the contents hot for extended cooking. Like the soda can alcohol stove, this one is also pretty much only good for one thing… boiling water. It’s also only good for boiling relatively small amounts of water so if you’re cooking for more than one person, this might not be the best choice.
If you’re interested in more information comparing various stove options, take a look at SGT Rock’s Hiking H.Q. Stove Comparison. He’s done a great job gathering lots of useful data for a wide variety of stove and fuel types.
Please give us you comments and recommendations! What else would you like to see or hear about?
If you haven’t done so already, why not register and subscribe? Once you’re a member you can post to our forum and comment on articles.
Enjoy!
joe
